
Test a new or used RG40XXH: stick drift, fake SD card, dead pixels
Just got a handheld, bought one second-hand, or something feels off? Before you blame a game or an emulator core, it’s worth checking the hardware itself. Device Checkup does that on the handheld, with the controller: every button, stick drift, the stick lights, the SD cards, the battery, both speakers and the screen. This guide walks through each test and tells you what a good result looks like.
Tested on: Anbernic RG40XXH · muOS 2601.0 Jacaranda · Device Checkup 2.0.0.
Step 1: Install Device Checkup
- Download
DeviceCheckup-<version>.muxappfrom the Device Checkup page. - Copy it to the
ARCHIVEfolder on SD card 1 (with a card reader or Wi-Fi Transfer). - On the handheld, open Applications → Archive Manager, select the file and press A.
- Open Applications → Device Checkup.
New to .muxapp files? See How to install apps on muOS with Archive Manager.
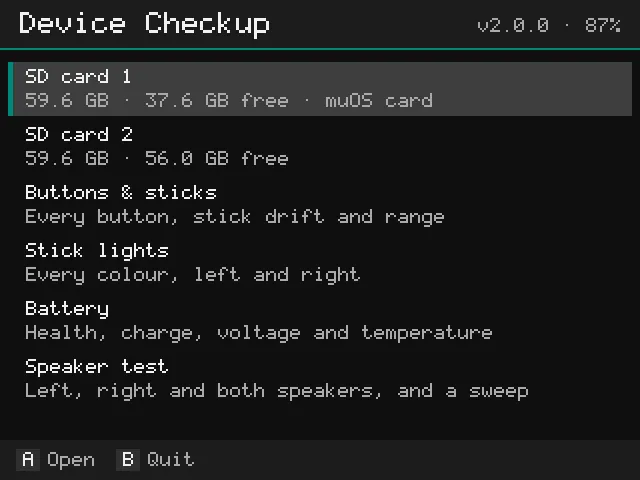
Free, every test included. Every test works straight away, with no account, sign-in or activation. When you’re done, Send report to email emails you the results of this session as a ZIP locked with a password you choose on the handheld (it needs Wi-Fi; pocketkode.com passes it on and doesn’t keep it).
Step 2: Buttons and stick drift
Open Buttons & sticks and press every button once. Each button lights up while you hold it and gets a green outline once it has been tested. When the counter says every button works, the buttons are fine. A button that doesn’t light up, or only lights up when pressed hard, is worn or dirty.
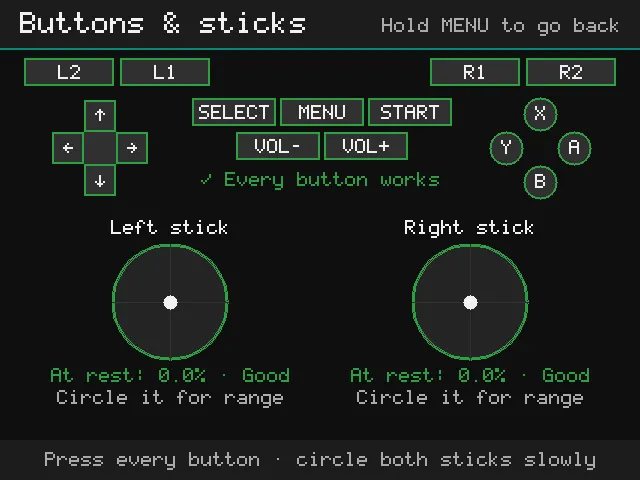
Then check each analogue stick:
| Reading | How to test | Good result |
|---|---|---|
| At rest | Let go of the stick and read the number | Up to 5% from the centre. More is drift: games move on their own |
| Range | Circle the stick slowly all the way round, twice | Close to 100%, so it reaches the edge in every direction |
A little drift can often be fixed: recalibrate the sticks in muOS’s settings or raise the dead zone in the emulator. If the “at rest” reading jumps around a lot, the stick itself may need cleaning or replacing.
To go back to the menu, hold MENU for 2 seconds (MENU is one of the buttons being tested too, so a short press doesn’t leave).
Step 3: Stick lights
The RG40XXH has RGB lights around both sticks. Open Stick lights: both sides turn red, then green, blue and white, and finally the left side alone and the right side alone. Press A or → for the next step, ← to go back and B when you’re done.
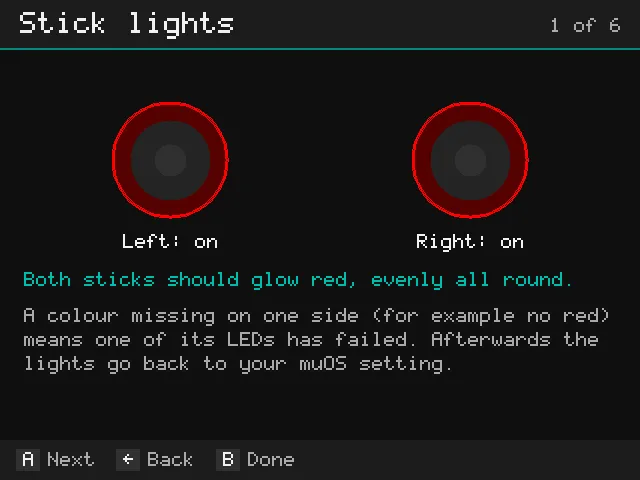
Each colour should glow evenly all the way round on both sides. If one colour is missing on one side (for example white looks yellow because the blue part is dead), one of that side’s LEDs has failed. When you leave the test, the lights go back to your muOS setting: your theme’s colours, or off. Handhelds without these lights don’t show the test.
Step 4: Check the SD cards
SD cards cause more “broken handheld” problems than anything else: games that won’t start, saves that disappear, muOS that freezes. Open SD card 1 or SD card 2. The top shows what the card says about itself: maker, name, production date, size and serial number. Device Checkup points it out when the maker isn’t a well-known one or the name doesn’t match the size, both typical of fake cards.
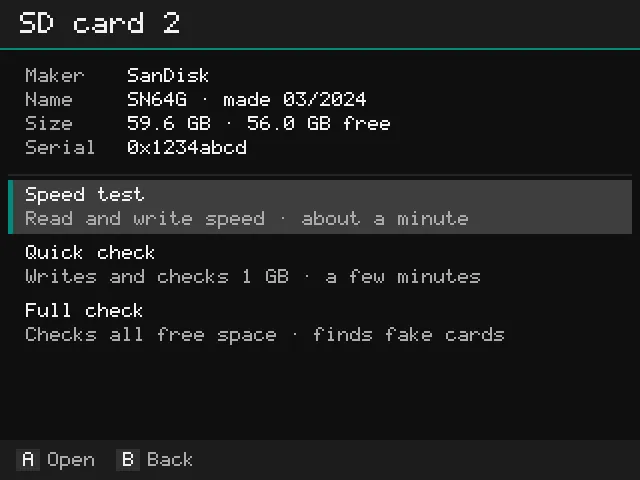
Then pick a test:
| Test | What it does | Time |
|---|---|---|
| Speed test | Writes a 256 MB test file, reads it back and shows the speed in MB/s | about a minute |
| Quick check | Writes 1 GB, reads it back and checks every byte. Finds cards that are failing | a few minutes |
| Full check | Fills all free space, reads it back and checks every byte. Finds fake cards that claim more space than they have | hours (roughly 1 hour per 20 to 40 GB free) |
- Your games and saves are never touched. Test data goes into its own hidden folder in free space and is deleted at the end, when you stop the test, or the next time the app starts after a crash.
- Plug in the charger for a full check. SD card 1 always keeps 2 GB free so muOS keeps running, which is why a new card is best tested in slot 2.
- To stop a test, press B, then A.
If a check says data came back wrong, don’t keep games or saves on that card. Copy what you can to a computer and replace it. Our guide to backing up your whole muOS SD card helps you move everything to a new one.
Step 5: Battery report and drain test
Open Battery to see what the power chip reports: charge, status, voltage, temperature and the chip’s own health status. Some handhelds also report current, power, the capacity now vs. new (health %) and charge cycles. The RG40XXH’s chip doesn’t, so those lines say “not reported”. Device Checkup never guesses a value it can’t read.
That’s what the drain test is for. Unplug the charger, press A and leave the handheld alone for 10 minutes with the screen on. It measures how fast the battery empties and how long a full charge lasts.
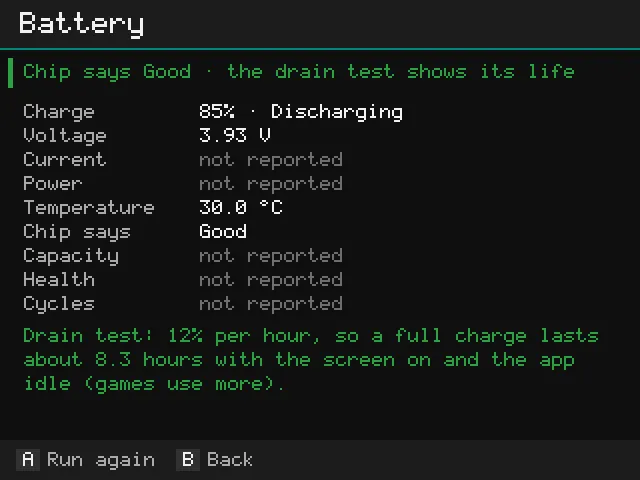
Our RG40XXH used 12% per hour, so about 8.3 hours from a full charge with the screen on and the app idle. Games use more, especially 3D systems. Two tips for a fair result:
- Start with the battery above about 30%, not right after unplugging a full charge.
- Keep the same screen brightness you normally play with.
If your result is much worse than expected for your model, or the percentage drops in big jumps, the battery is probably worn. Run the test twice to be sure.
Step 6: Speaker test
Open Speaker test. Press ← for a tone on the left speaker only, → for the right, A for both and Y for a sweep from low to high. Use the volume buttons to adjust.
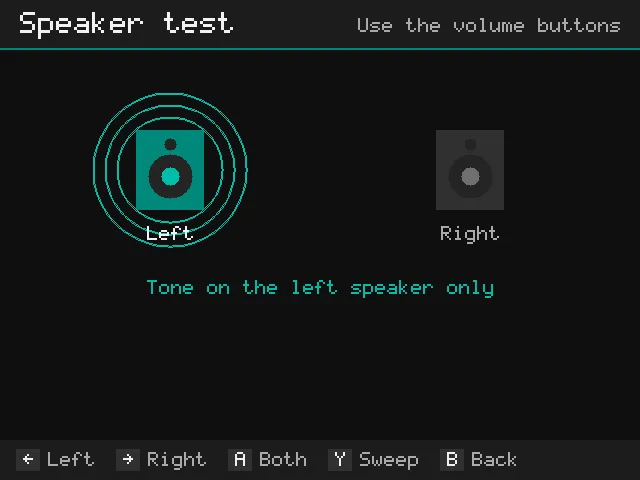
The tone should come only from that side and sound clean. The sweep makes rattles and buzzing easy to hear: a buzz at certain notes usually means a loose speaker or something touching it inside the shell.
Step 7: Screen test for dead and stuck pixels
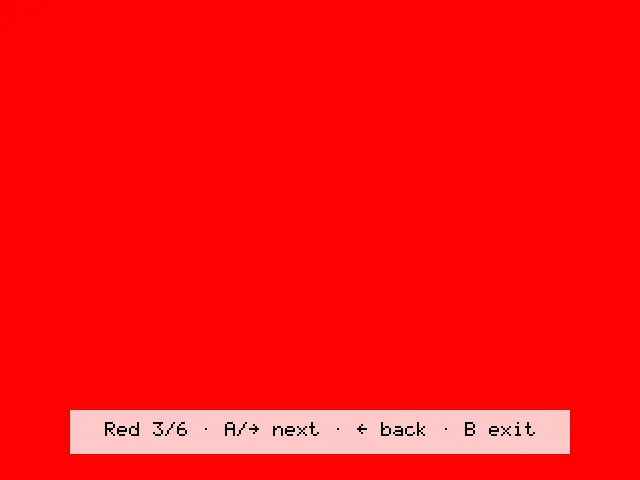
Open Screen test. The whole screen fills with one colour at a time: black, white, red, green, blue and grey. Press A or → for the next colour, ← to go back and B to exit. The hint at the bottom disappears after 3 seconds so you can check the whole screen.
| What you see | What it is |
|---|---|
| A dark dot on every colour, including white | A dead pixel |
| A dot that keeps one colour, for example red on the black screen | A stuck pixel (sometimes it frees itself after a while) |
| Brighter patches at the edges on black | Backlight bleed, common on handheld screens |
Look closely on white and black first: they show most problems.
A quick checklist for a used handheld
- Buttons & sticks: every button works, sticks under 5% at rest and close to 100% range.
- Stick lights: every colour on both sides, and each side lights up alone.
- SD card 1: quick check passes. On a card you don’t trust, run a full check in slot 2.
- Battery: drain test gives a runtime close to what the model should manage.
- Speakers: both sides work, no buzzing in the sweep.
- Screen: no dead or stuck pixels on white and black.
Everything fine? Time to play: see how to install free homebrew games with Game Manager.
Troubleshooting
- The report email doesn’t arrive: look in the spam folder after a few minutes, and check the address you typed (it’s shown when you send the next report). Each address can get up to 5 reports a day.
- Something else: the log is
logs/app.login the app’s folder. Email it to feedback@pocketkode.com with your device and muOS version.
PocketKode makes Device Checkup. It isn’t affiliated with muOS or Anbernic.